普通机器安装sub store
1.1.安装 unzip wget git
sudo apt install unzip wget git -y
1.2.下载和安装 fnm (Node.js版本管理器)
curl -fsSL https://fnm.vercel.app/install | bash
1.3.更新环境
source 刷新的目录根据用户登陆的账户名有关。不必照抄/root/.bashrc
source /root/.bashrc
安装node.js
fnm install v20.10.0

安装 PNPM 软件包管理器
curl -fsSL https://get.pnpm.io/install.sh | sh -
source /root/.bashrc
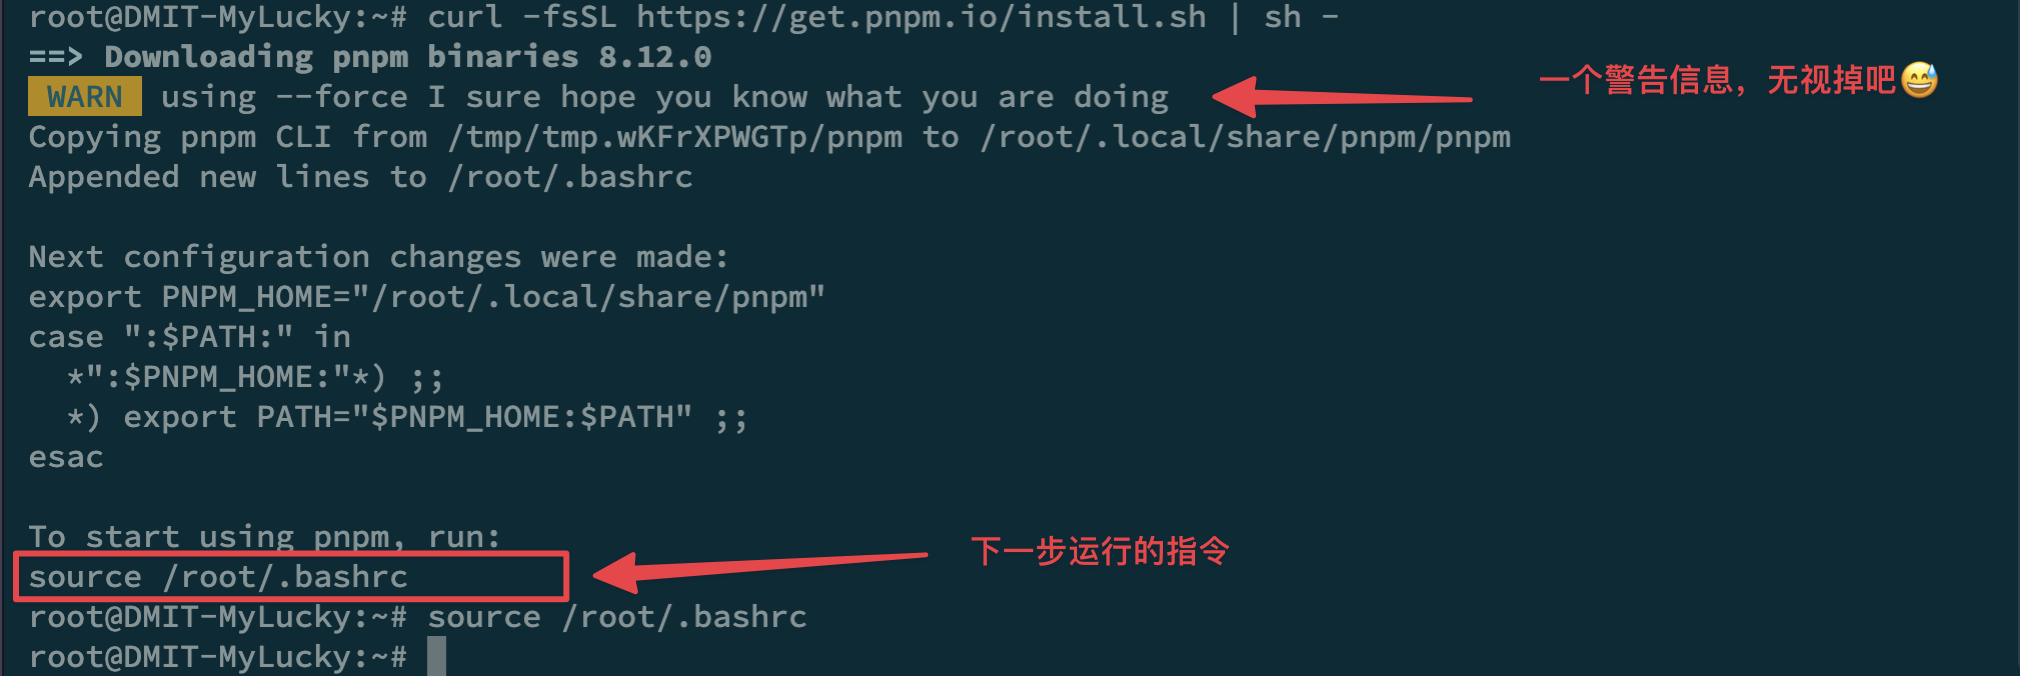
创建Sub-store的安装文件夹并进入该文件夹
我这里是直接在root根目录下创建的文件夹
你可以根据自己的情况选择其它位置
但是注意其它位置的后续写service的时候对应目录
mkdir -p /root/sub-store
cd sub-store
下载后端sub-store脚本
curl -fsSL https://github.com/sub-store-org/Sub-Store/releases/latest/download/sub-store.bundle.js -o sub-store.bundle.js
下载前端页面并解压缩
https://wwcd.lanzoup.com/ieQqf2es5eva
使用这个需要在本地安装vscode,node,pnpm.具体安装步骤可自行百度不过多介绍了
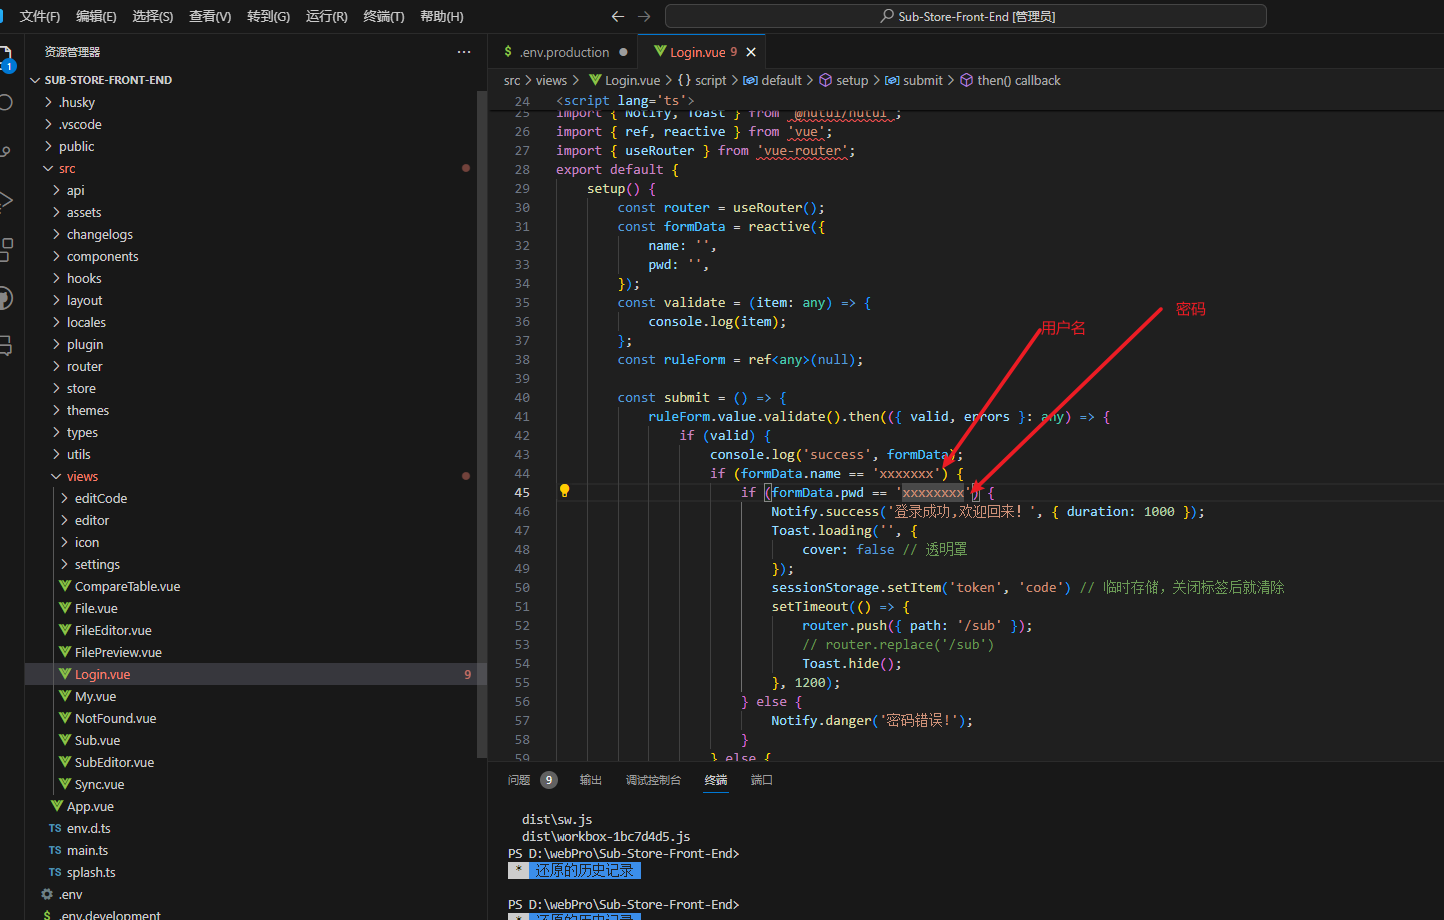
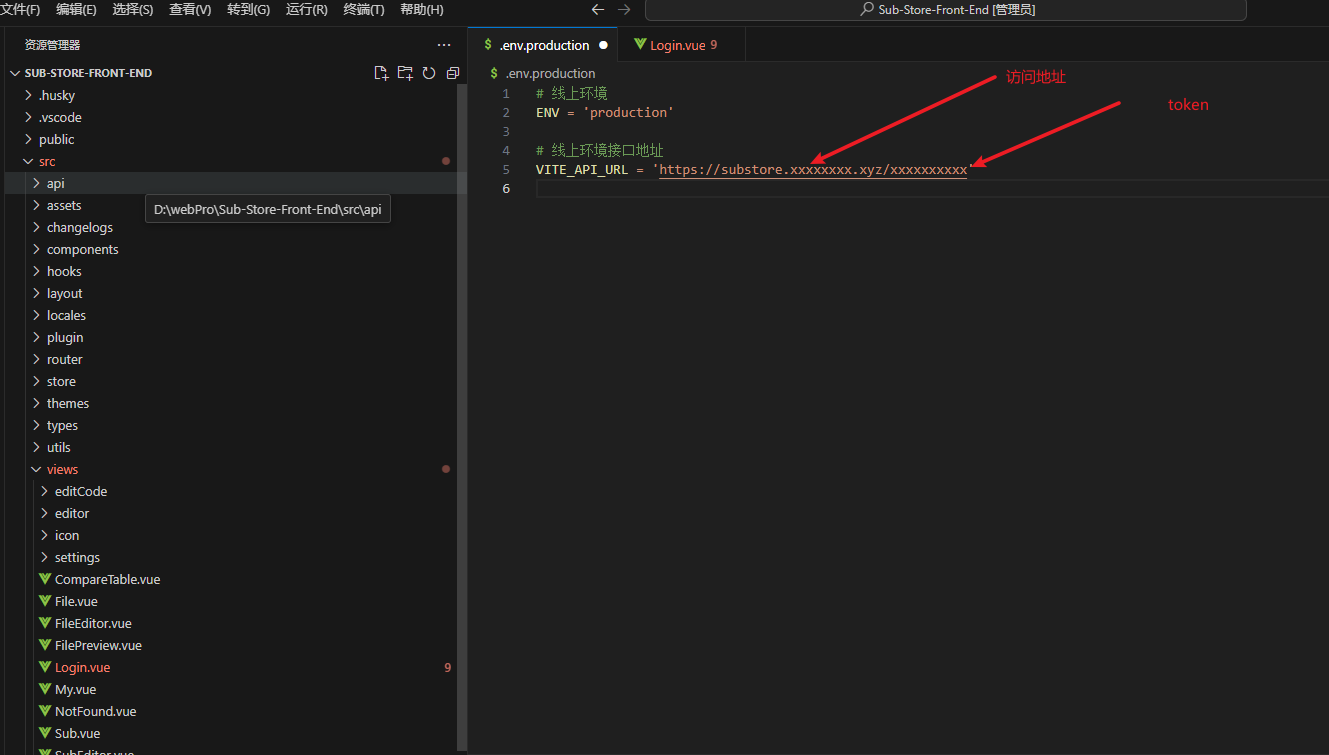
打包
pnpm build
上传目录并解压
unzip dist.zip && mv dist frontend && rm dist.zip
编写服务
输入下面指令编写服务:
vim /etc/systemd/system/sub-store.service
将下列文本根据自己的用户名和文件夹名字进行修改后粘贴进去:
这里的XXXXX跟自己打包的.env.production目录的token为同一个token
[Unit]
Description=Sub-Store
After=network-online.target
Wants=network-online.target systemd-networkd-wait-online.service
[Service]
LimitNOFILE=32767
Type=simple
Environment="SUB_STORE_FRONTEND_BACKEND_PATH=/XXXXXXXXXX"
Environment="SUB_STORE_BACKEND_CRON=0 0 * * *"
Environment="SUB_STORE_FRONTEND_PATH=/root/sub-store/frontend"
Environment="SUB_STORE_FRONTEND_HOST=0.0.0.0"
Environment="SUB_STORE_FRONTEND_PORT=3001"
Environment="SUB_STORE_DATA_BASE_PATH=/root/sub-store"
Environment="SUB_STORE_BACKEND_API_HOST=127.0.0.1"
Environment="SUB_STORE_BACKEND_API_PORT=3000"
ExecStart=/root/.local/share/fnm/fnm exec --using v20.10.0 node /root/sub-store/sub-store.bundle.js
User=root
Group=root
Restart=on-failure
RestartSec=5s
ExecStartPre=/bin/sh -c ulimit -n 51200
StandardOutput=journal
StandardError=journal
[Install]
WantedBy=multi-user.target
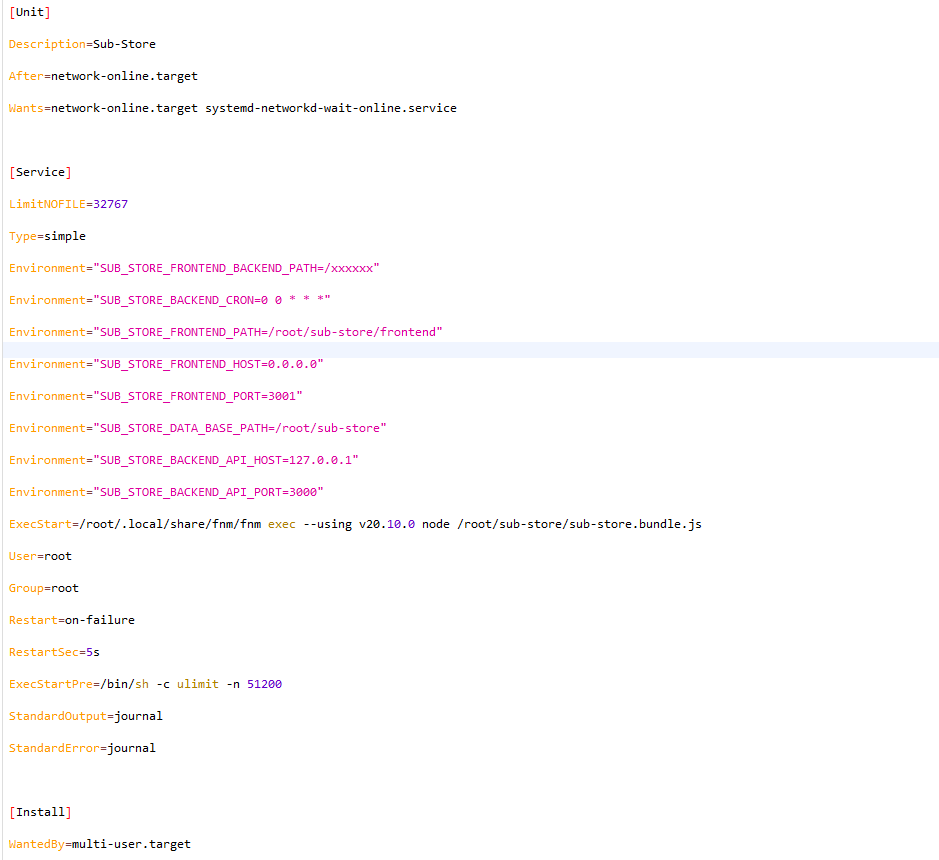
粘贴进去后按 esc 键,接着输入 :wq保存退出
接下来先将服务启动,服务开机自启,查看状态
systemctl start sub-store.service
systemctl enable sub-store.service
systemctl status sub-store.service
正常情况下会显示如下:

图示中的服务名我编写为substore.service,和教程有所不同
如果出现报错信息
使用指令:
journalctl -f -u sub-store -o cat -n 100
来查看具体的错误信息和原因来进行解决
如果你不想部署nginx,到此处已经结束,可以直接通过IP的方式来进行使用,访问方式为:http://x.x.x.x:3001?api=http://x.x.x.x:3001/2cXaAxRGfddmGz2yx1wA (将其中的x.x.x.x换成你的VPS IP)如果想使用域名并使用ssl,请接着往下看。
至此前后端的部署部分已经完成,接下来就是nginx部分。
1.4.nginx部署过程
安装nginx
sudo apt install nginx -y
编辑nginx配置
sudo vim /etc/nginx/sites-enabled/sub-store.conf
证书申请
bash <(curl -H 'Cache-Control: no-cache' -Ls https://raw.githubusercontent.com/liulisanwan/shell-liulisanwan/refs/heads/main/certificate.sh)


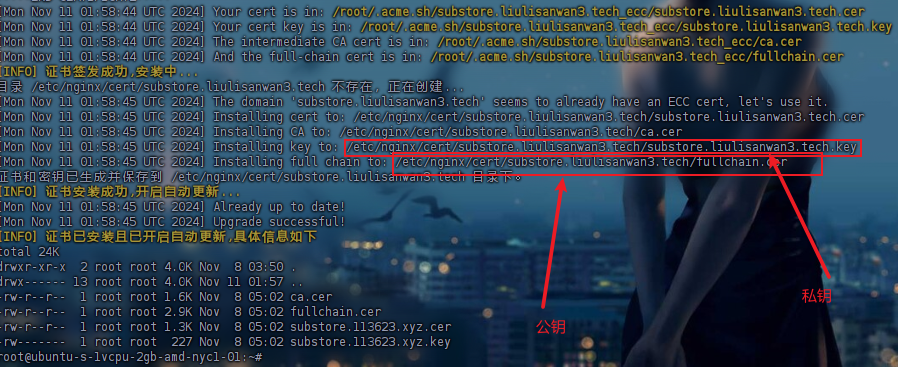
根据自己的前面域名设置将以下内容改好后复制进去并保存
配置的时候把需要修改成自己的
server {
listen 443 ssl http2;
listen [::]:443 ssl http2;
server_name substore.liulisanwan3.tech;
ssl_certificate /etc/nginx/cert/substore.liulisanwan3.tech/fullchain.cer;
ssl_certificate_key /etc/nginx/cert/substore.liulisanwan3.tech/substore.liulisanwan3.tech.key;
location / {
proxy_pass http://127.0.0.1:3001;
proxy_set_header Host $host;
proxy_set_header X-Real-IP $remote_addr;
proxy_set_header X-Forwarded-For $proxy_add_x_forwarded_for;
}
}
编写完毕保存后输入:nginx -t 查看配置是否正确,如果正确输入:nginx -s reload重载配置,如果出现错误输入:nginx -s stop 停止nginx运行, 并根据提示信息进行排查。
最后nginx重启
systemctl restart nginx